

In this article we will show the procedure how to connect an external disk to the Proxmox VE system as additional storage for use in a virtualization environment.
Management of disks in Proxmox VE can be found in the Disks menu:
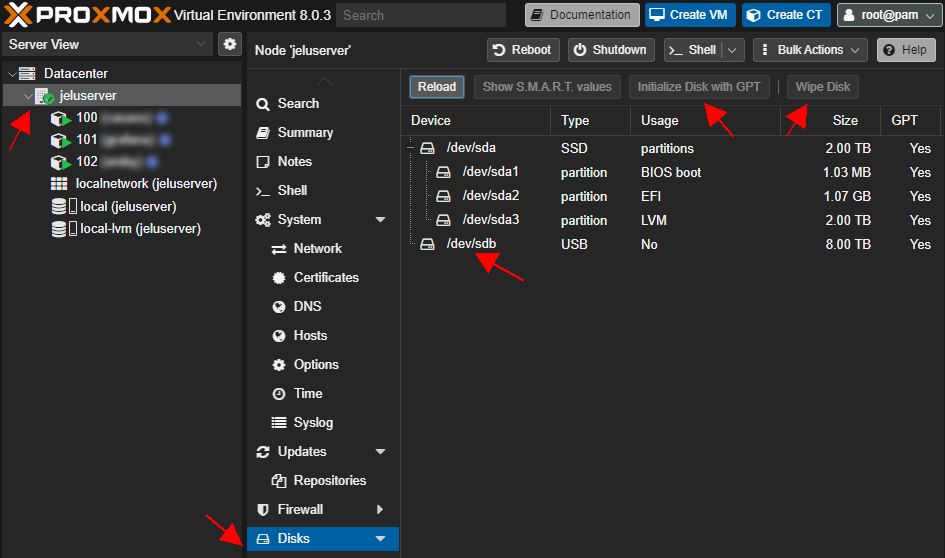
The newly connected disk should have the mark "Type: USB". I recommend resetting the whole disk and setting a new partition table.
- click the Wipe Disk option to reset the disk
- then Initialize Disk with GPT to create a GUID Partition Table (GPT)
Next, we switch to Shell and find the distribution of disks in the system.
lsblk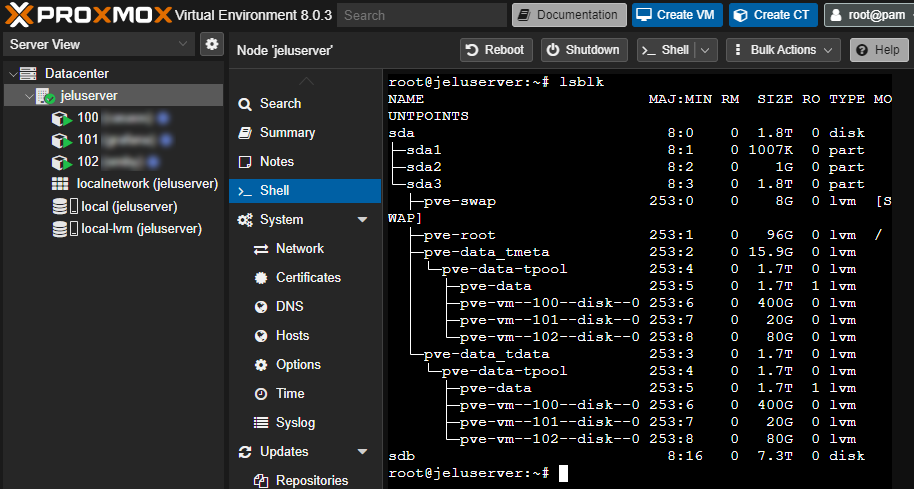
Our new disk is identified with the name dev/sdb and at this moment we will need to create a new disk partition (partition).
fdisk /dev/sdbWe make the options as follows:
- Press
gto create a new empty GPT partition table. - Press
nto add new partition. - Press
Enterto select default partition number. - Press
Enterto select default first sector. - Press
Enterto select default last sector, which uses the whole disk. - Press
tto change the partition type (if it is needed) and select the type that suits your needs, for example83for a linux filesystem. - Press
wto write changes to disk.
After creating the partition you can format the partition to the required file system, in our case it will be ext4.
mkfs.ext4 /dev/sdb1Finally you can mount the newly created partition:
mkdir /mnt/usb-drive
mount /dev/sdb1 /mnt/usb-drive
The last adjustment is to update the /etc/fstab file to ensure that your system automatically mounts the partitions at every boot. Before any change it is important to backup the existing file /etc/fstab in case that something goes wrong.
nano /etc/fstabAt the end of the file, we add this line:
/dev/sdb1 /mnt/usb-drive ext4 defaults 0 2Adding disk to Storage
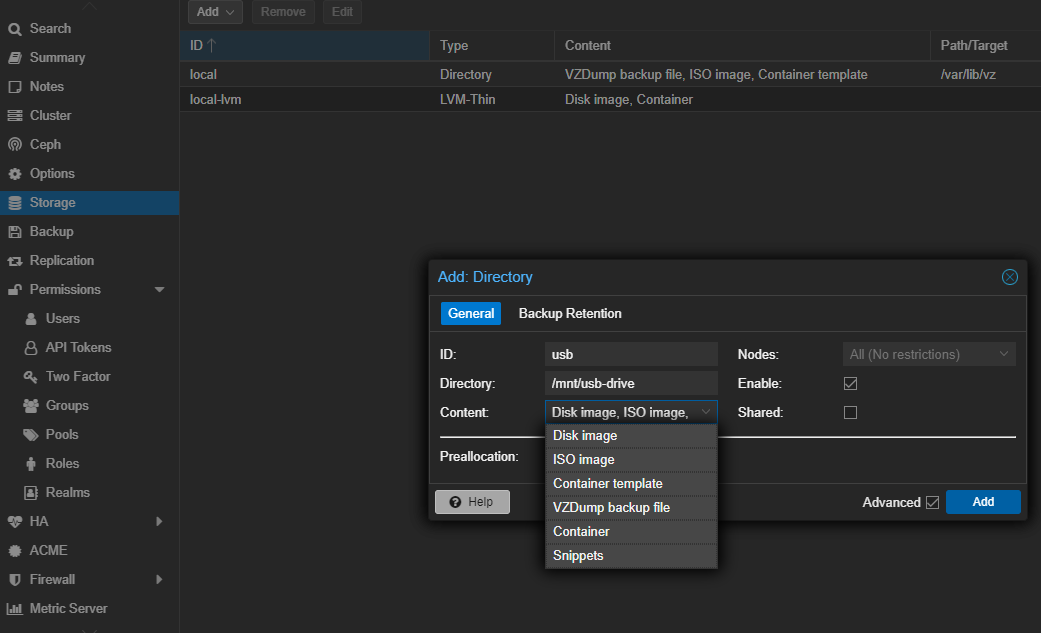
In the Proxmox web interface
- go to Datacenter > Storage
- choose the option Add > Directory
- in ID put name usb
- in Directory field put /mnt /usb-drive
- in the Content field, mark all the required types of content (Disk image, ISO image, Container image, VZDump backup file, Container, Snippets)
- and click Add to complete adding the new storage
In the ext4 format Linux kernel it starts converting the disk using the ext4lazyinit process. This makes the disk appear essentially permanent, but any demanding activity. ext4lazyinit performs progressive initialization of inode tables and this background processing helps speed up the formatting process, because not all inodes need to be initialized at once. This makes the disk usable practically immediately, without the lengthy process of complete initialization.
Duration of ext4lazyinit depends on disk size and system configuration. For large disks this process can take several hours to days, but usually doesn't restrict normal system usage, because it is running in the background.