

How to install LAMP configuration on Wedos VPS ON with a clean install of Debian 9, including getting Let's Encrypt certificate up.
This article is old.
Immediately after starting the email service root access to the server using SSH will come. This instruction is designed for Linux Debian 9. Version of your the system can be found with the command:
cat /etc/debian_version
Log in to the server and perform the upgrade:
apt-get update

apt-get upgrade
For easier orientation in the file system we install Midnight Commander with the command:
apt-get install mc
We will install apt extensions specifically aptitude. This will allow us to conveniently install other necessary components.
apt-get install -y aptitude
Installation APACHE
We will install APACHE2 server
aptitude install apache2
Server start
service apache2 start
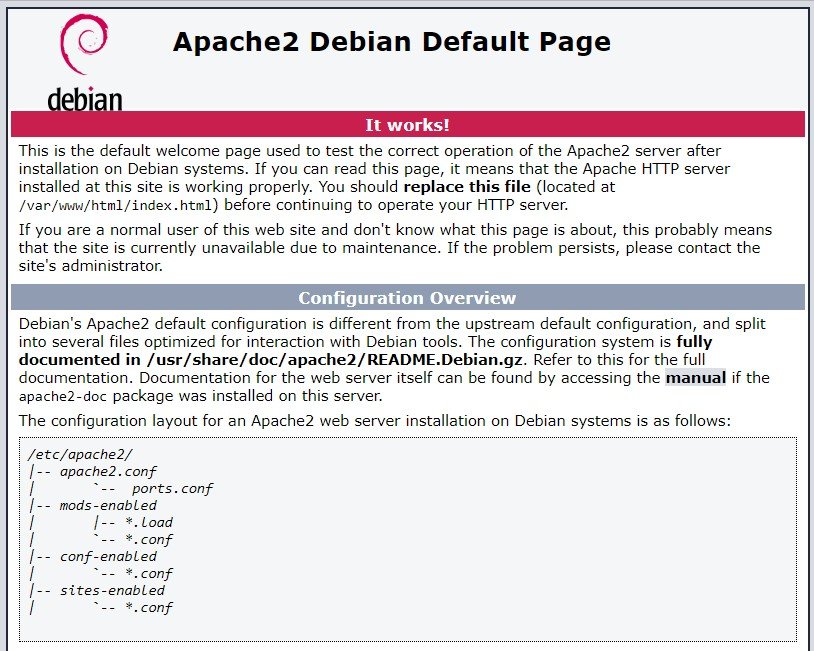
And we test whether everything is working as it should, by entering the IP address of the server, which you can find in the email about activating the service. The default page "Apache2 Debian Default Page" should appear.
To verify proper functioning we can use the command
service apache2 status
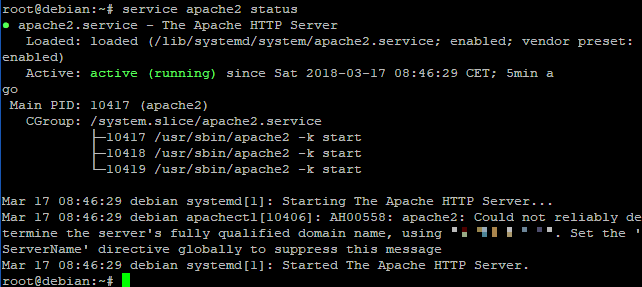
Apache is running however it reports the error "Could not reliably determine the server's fully qualified domain name". I don't have ServerName set, which it is ideally a specific domain. For these purposes we register a 2nd-level domain in standard Wedos customer administration. How to set DNS domains and subsequently the ServerName directive we'll get later in this guide.
Let's enable mod_rewrite module for address rewriting:
a2enmod rewrite
Edit the file /etc/apache2/apache2.conf to enable address rewriting for the var/www directory.
<Directory /var/www/>
       Options Indexes FollowSymLinks
    AllowOverride All
       Require all granted
</Directory>
Install PHP 7
apt-get install apache2 libapache2-mod-php
Install PHP 5.6
apt-get install software-properties-common
apt-get install apt-transport-https lsb-release ca-certificates
wget -O /etc/apt/trusted.gpg.d/php.gpg https://packages.sury.org/php/apt.gpg
echo "deb https://packages.sury.org/php/ $(lsb_release -sc) main" > /etc/apt/sources.list.d/php. list
apt-get update
aptitude install php5.6
Installation extensions for PHP5.6
aptitude install memcached php5.6-memcache
apt-get install php5.6-gd
apt-get install php5.6-intl
apt-get install php5.6-mysql
apt-get install php5.6-mbstring
apt-get install php5.6-xml
PHP option
update-alternatives --config php
This allows us to choose the active PHP version.
PHP functionality test
touch /var/www/html/test.php
echo -e '<?php\nphpinfo();' > /var/www/html/test2.phpInstalling MySQL
aptitude install mysql-server
We will immediately create a user who will have access to MySQL
mysql

CREATE USER 'user1'@'localhost' IDENTIFIED BY 'password123';
GRANT ALTER,INDEX,CREATE,INSERT,UPDATE,SELECT,DELETE,DROP ON *.* TO 'user1'@'localhost';
FLUSH PRIVILEGES;
Additionally as needed set innodb_buffer_pool_size.
Install FTP access
apt-get install proftpd
Edit the configuration file /etc/proftpd/proftpd.conf < /p>
UseIPv6 off
DefaultRoot ~
Port 1980
/bin/false
Create FTP user
adduser ftpuser1 --shell /bin/false

sudo passwd ftpuser1

chown ftpuser1 /var/www/html

systemctl restart proftpd
The command to possibly delete users is
userdel ftpuser1
Restrictive access for FTP users
More users can be created, including setting their access to specific folders. Key the DefaultRoot value is set in the file /etc/proftpd/proftpd.conf
Sample how permissions can be set:
DefaultRoot ~
DefaultRoot /var/www/html/web1 ftpuser2
DefaultRoot /var/www/html/web2 ftpuser3
User groups
A much sophisticated way to work with users is to create a group, assign users to a group and set group permissions.
sudo groupadd ftpusers
usermod -a -G ftpusers ftpuser1
usermod -a -G ftpusers ftpuser2
DefaultRoot /var/www ftpusers
Setting group for access to directory /var/www
chgrp -R ftpusers /var/www
Change group and owner :
chown -R ftpuser2:ftpusers /var/www/etc/group and a list of all users in the /etc/passwd file.
FTP access security
cd /etc/ssl/private
openssl req -x509 -nodes -newkey rsa:2048 -keyout proftpd.pem -out proftpd.pem -days 365
chmod 600 proftpd.pem
Include /etc/proftpd/tls.conf
We set TLS configuration in /etc/proftpd/tls.conf
TLSEngine                    he
TLSLog                      /var/log/proftpd/tls.log
TLSProtocol                SSLv23
TLSRSACertificateFile      /etc/ssl/private/proftpd.pem
TLSRSACertificateKeyFile   /etc/ssl/private/proftpd.pem
and restart proFTPD
systemctl restart proftpd
Setting system name server< /h2>
It is necessary to set your server name in /etc/hostname
mujserver.tld
and also in /etc/hosts.
vase.ip.adre.sa mujserver.tld
Then I recommend to restart the server.< /p>
reboot
Then we can check if HostName is set correctly
hostnamectl
Installing sending emails from PHP
First we install sendmail:
apt-get install sendmail
We start sendmail configuration:
sendmailconfigservice apache2 restart
now everything is ready and emails can be sent from PHP with the mail() function.
HTTPS - Installation Let's Encrypt
To the file etc/apt/sources.list add the line
deb http: //ftp.debian.org/debian stretch-backports main
and provedeme update
apt update
Let's install CERTBOT< /p>
apt-get install python-certbot-apache -t stretch-backports
certbot --authenticator webroot --installer apache
We generate si certificate for our domain
certbot certonly --webroot -w /var/www/html -d mujserver.tld -d www.mujserver.tldEdit file /etc/apache2/sites-available/default-ssl .conf
DocumentRoot /var/www/html
ServerName myserver.tld
SLEngine on
SLCertificateFile /etc/letsencrypt/live/mujserver.tld/cert.pem
SSLCertificateKeyFile /etc/letsencrypt/live/mujserver.tld/privkey.pem
SSLCertificateChainFile /etc/letsencrypt/live/mujserver.tld/chain.pem
Let's start APACHE ssl extension, default web and restart APACHE:
a2enmod ssl
a2ensite default-ssl.conf
service apache2 restart
At this time it should be working https://< span style="background-color:#FFFF00;">mujserver.tld
Security FTP and SSH
To not attack the server hackers and robots will need to secure SSH and FTP access using the file /etc/host.allow and /etc/host.deny
to file /etc/host.allow add your IP address
sshd: xxx.xxx.xxx.xxx
proftpd: xxx.xxx.xxx.xxx
and to file /etc/host.deny
sshd: ALL
proftpd: ALL
and restart service sshd
service sshd restartusers.
In conclusion
And that's it! At this moment we have everything installed.
UPDATE:
Installation supports MS SQL
sudo apt-get install php5.6-sybase freetds-common libsybdb5 apach2ctl restart/strong>" and its cause was insufficient available RAM. In this case we can solve it by setting the system swap file, which is used in if there isn't enough memory available.
So let's look in the log what is happening..
/var/log /mysql/error.log
where is the following problem..
[NOTE] Initializing buffer pool, size = 1.0G InnoDB: mmap (140574720 bytes) failed; errno 12
[ERROR] InnoDB: Cannot allocate memory for the buffer pool
[ERROR] InnoDB: Plugin 'InnoDB' init function returned error.
[ERROR] InnoDB: Plugin 'InnoDB' registration as a STORAGE ENGINE failed.
[ERROR] Aborting

At the same time if we check the RAM usage
free -m
and shows
Swap: 0 0 0
it's obvious that we will need to setup system swapping.
Let's create swapfile ( commands are in role root )< /h3>fallocate -l 4G /swapfile
ls -lh /swapfile
fallocate -l 4G /swapfileThe result will be..
-rw-r--r-- 1 root root 4.0G Apr 30 17:19 /swapfile
Settings Security
chmod 600 /swapfileSecurity check
ls -lh /swapfile
should show..
-rw------- 1 root root 4.0G Apr 30 17:19 /swapfile
Let's tell the system about the file
mkswap /swapfile
swapon /swapfile
swapon -s
Additional settings to make the swap file permanent..
nano /etc/fstab
to fstab then add a line
/swapfile swap swap defaults 0 0and check if everything is set
swapon --show

and also if swap is actually used..
free -m
